Category Archives: open source

GIMP 2.6.1 Review and its Future

Gimp is an image editing program.  It has support on on the most moder operating systems including Unix (Linux), OS X, and Windows. If you can’t afford Photoshop (or don’t want to steal it), GIMP is the best alternative out there – I encourage you to at least download it and try it.

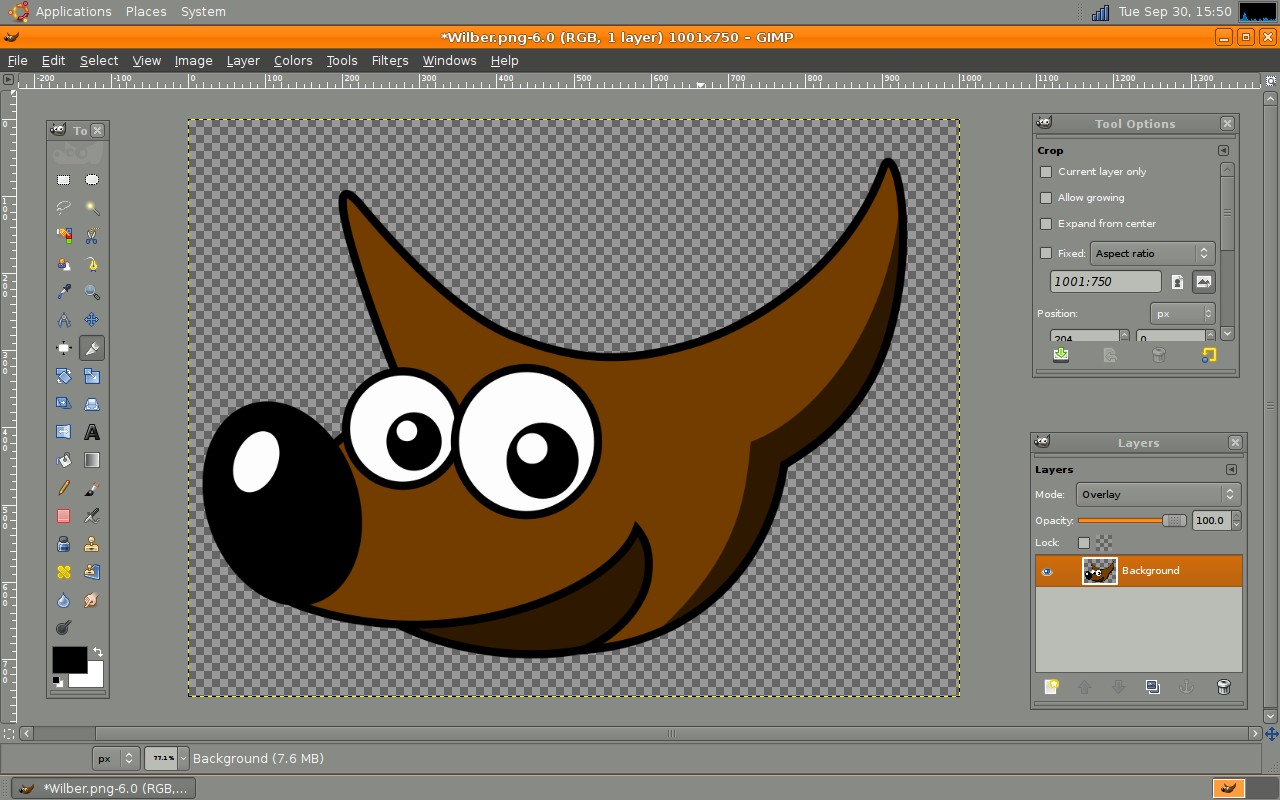
For those that have tried GIMP before, the most recognized new feature is that GIMP is now in one window. It isn’t exactly how the GIMP community wanted it (more like inkscape) but it is much better than it used to be.
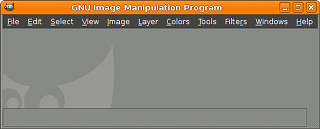
Some other new features are that the toolbox menu has been removed, it has been replaced with an empty image window. The empty image window acts as a natural window pane and is the place where you edit your images.
The most useful feature is that you can not edit your image by panning over the border. This creates a less constrained atmosphere and makes the designers job faster and easier.
There are even more changes which you can see over at the GIMP website.

The major problem with GIMP version 2.4.2 and below was that it was not one window.  This made it very hard for people to go to Photoshop on a Windows box to GIMP.  The GIMP GUI team listened to the many complaints and finally attempted it. It wasn’t exactly what people wanted but it gets the job done.
With the new release GIMP users are finding more things to complain about. The first complaint was that Wilber (GIMP mascot) was taking up too much space – it is fixable.
Another hard thing to adjust to when moving from Photoshop to GIMP is the animation editor. GIMP’s animation editor works but it has a high learning curve. You can’t use Photoshop ideals for animation in GIMP.
What GIMP does need is layer folders/groups/tree. It is very hard to organize layers without them. This should be a very simple and easy fix for the next official release (3rd-party script-fu plugins are available but they are far from perfect).

The new version of GIMP is much better than its predicesors – but it still has a long way to go. GIMP has enough features now that Photoshop is finding it hard to compete. Adobe CS4 is coming out with a feature that GIMP already has a plugin for. GIMP is setting itself up for secess by being a GNU project and making itself free software that any designer can edit or change to their liking. Now, perhaps someone might actually make a good GIMP tutorial website.

The Age of Technology is Now

The future is now. There is no excuse for every family not to have a computer with internet access. Children in third-world-countries can enjoy technology if you donate $100 to One Laptop per Child (OLPC). There are other options too. There is the nimbus cloud computer that is almost 100% free – all you have to do is pay $9.99 for shipping. However you can only buy the nimbus in the States and you may have to put up with advertisements. Others may be more interested in the Eee PC by Asus for as little as $300. Most restaurants now have free WiFi so users now have the internet at their fingertips. Home users are also opening up their routers to share the goodness with networks like FON.

How is it possible to have all this technology available and offer it for so little money? Linux. You will never see a Windows or Mac computer being sold for next to nothing. Thank you Linux for providing the world with internet.

Viewing Your Linux Partition in Windows

If you are using Windows XP or Vista and have Linux you may be wondering where your Linux partition is. Most likely it is not showing up in My Computer. This is because most Linux partitions are formated in Ext2/3. Windows does not recognize this type of file system. If you have a floppy/thumb drive that is formatted in this way, it too will not show up.

The solution is FS-Driver. Installation is very simple. Download then run the executable in Windows. The set-up menu (above) should look very similar to your operating system’s own partition manager. Select your partition and drive letter and then you will see your Linux drive in My Computer. I suggest that if you have a separate partition for /home that you just use that.

PeerGuardian For Linux = MoBlock and mobloquer

If you download files mobloquerwith Windows XP or Vista most likely you use PeerGuardian 2 from Phoenix Labs to protect yourself. PeerGuardian blocks IPs making it the safest and easiest way to protect your privacy on P2P. If you are using Linux, however, you can’t use PG2; instead use MoBlock.

To download MoBlock install the deb package.

Add source files (System -> Administration -> Software Sources -> Add…)

deb http://moblock-deb.sourceforge.net/debian gutsy main
deb-src http://moblock-deb.sourceforge.net/debian gutsy main

Then in the command line run:

gpg –keyserver wwwkeys.eu.pgp.net –recv 9072870B
gpg –export –armor 9072870B | sudo apt-key add –

double dashes above except at apt-key add-

sudo apt-get update
sudo apt-get install moblock-nfq

Restart and there you have it; MoBlock is installed. MoBlock can be run and tested in the command line.

  • moblock-control start – inserts iptables rules and starts MoBlock
  • moblock-control stop – deletes iptables rules and stops MoBlock
  • moblock-control restart – restarts MoBlock
  • moblock-control reload – rebuilds the blocklist and reloads MoBlock
  • moblock-control update – updates the blocklists and reloads MoBlock
  • moblock-control status – gives the iptables settings and the status of the MoBlock daemon
  • moblock-control test – simple test to check if MoBlock is working

If your internet is down stop MoBlock and do one of the following:

If you have Ubuntu Gutsy 7.10 download the latest version of mobloquer. mobloquer is a GUI for MoBlock that works in Debian lenny and sid and Ubuntu gutsy and hardy (As seen in screenshot above). You should download this even if your internet works just for ease of access. Extract.

tar -xvf mobloquer-xx.tar.gz
cd mobloquer
qmake-qt4make
sudo make install

You may have to install qmake-qt4. If you do just run the line the command line give you.

If you do not have Debian lenny and sid and Ubuntu gutsy and hardy you will have to edit your config file which is located at /etc/moblock/moblock.conf to open ports and enable IPs.

Wacom Tablet in Ubuntu

For most graphic designers a tablet is a must. One of the best tablet makers out there is Wacom. Due to the myth about Linux not having drivers support for everyday necessities, designers have steered clear of Linux. However, Wacom now supports the open source movement.

The process is not that difficult but you will have to use the command line and edit files. First download the official, latest, stable version of the driver. Extract.

cd linuxwacom
sudo ./configure
make
sudo cp /etc/X11/xorg.conf /etc/X11/xorg.conf.bak
sudo gedit /etc/X11/xorg.conf

The last two lines helped open up the xorg file. Edit the xorg file so it looks somewhat like this.

Section “InputDevice”
Driver “wacom”
Identifier “stylus”
Option “Device” “/dev/ttyS0” #SERIAL ONLY

Option “Device” “/dev/input/wacom” #USB ONLY
Option “Type” “stylus”
Option “USB” “on” #USB ONLY

Option “ForceDevice” “ISDV4” #Tablet PC ONLY
EndSection

Section “InputDevice”
Driver “wacom”
Identifier “eraser”

Option “Device” “/dev/ttyS0” #SERIAL ONLY
Option “Device” “/dev/input/wacom” #USB ONLY
Option “Type” “eraser”

Option “USB” “on” #USB ONLY
Option “ForceDevice” “ISDV4” #Tablet PC ONLY
EndSection

Section “InputDevice”

Driver “wacom”
Identifier “cursor”
Option “Device” “/dev/ttyS0” #SERIAL ONLY
Option “Device” “/dev/input/wacom” #USB ONLY

Option “Type” “cursor”
Option “Mode” “relative”
Option “USB” “on” #USB ONLY

Option “ForceDevice” “ISDV4” #Tablet PC ONLY
EndSection

If you have a Intuos3 or Cintiq 21UX add this.

Section “InputDevice”
Driver “wacom”
Identifier “pad”
Option “Device” “/dev/ttyS0” #SERIAL ONLY

Option “Device” “/dev/input/wacom” #USB ONLY
Option “Type” “pad”
Option “USB” “on” #USB ONLY

EndSection

Section “ServerLayout”
Identifier “Default Layout”
Screen “Default Screen”
InputDevice “Generic Keyboard”
InputDevice “Configured Mouse”
InputDevice “stylus” “SendCoreEvents”
InputDevice “eraser” “SendCoreEvents”
InputDevice “cursor” “SendCoreEvents” #For non-LCD tablets only
InputDevice “pad” #For Intuos3/Cintiq 21UX/Graphire4 tablets. It should NOT send core event
EndSection

For pressure sensitivity add this line to the Stylus section.

Option “PressCurve” “50,0,100,50”

Now to use your tablet in Gimp you have change some things around in gimp.

File-> Preferences-> Input Devices-> “Configure Extended Input Devices”.
Under “Device” you will have 3 settings: Cursor, Eraser and Stylus. Set them from “Disabled” to “Screen”.

Now you should have pressure sensitivity in Gimp. *Hooray!* Just a side note, each input device (stylus,cursor,eraser) has a completely different set of attributes in Gimp, and in theory, you can even assign a unique serial number to different pens to get even more granularity. You will experience this when you try to use your eraser for the first time. Rather than selecting the eraser tool, you get the rectangle selection tool instead. This is by design, believe it or not. Gimp does not care that its an eraser, just that it’s not the pen you were just using. If you choose the eraser tool now, it will remember that for the next time you try to use it. On the plus side, you can set the eraser to be anything, including the Airbrush tool or Clone tool.

If you have any trouble check out the Ubuntu forums and the Wacom Help Page.

Installing a new GTK+ Engine in Ubuntu

The default GTK+ engine for Ubuntu Gutsy 7.10 is great but some users want more. There are many great engines out there but in this tutorial will screenshottell you how to install Aurora.

Download and Extract files. In the command line type:
cd …/aurora-1.3
./configure ––prefix=/usr
./config -enable-animation
make
sudo make install

–prefix=/usr is two double dashes, WordPress screws up the layout. two of these: –

Then in the Theme Manager (System -> Preferance -> Appearance) Drag the gtkrc_themes.tar.bz folder to install the themes. It will atuomatically install the three themes.

If you get an error like this during this process

configure: error: GTK+-2.10 is required to compile aurora

Run sudo apt-get install libgtk2.0-dev in the command line.

To install more themes, GTK+ Engines, icons, or login screens visit art.gnome.org or gnome-look.org

Please share which GTK+ Engine you enjoy the most or screenshots. I know many people will say that clearlooks is the best.

Connecting to the Internet on Gutsy

This little guide will tell you how to enable the firmware for Broadcom 43xx chipsets when you get the following error message in Ubuntu Gutsy 7.10.

The software source for the package bcm43xx-fwcutter is not enabled.

In order to do this you will need to have a computer with internet. If you don’t have a computer with internet go to your local library and put the files on a flash drive. If you are lucky enough to plug your computer in via wire do that.

All you have to do is download bcm43xx-fwcutter. It is a deb package so it is a graphical install. Install it. Restart computer.

Download bcm43xx(wl_apsta).

Next go to restricted drivers (System -> Administation – > Restricted Drivers Manager) and click enable. A diolage box should pop up telling you to specify a location of firmware. Point to bcm43xx(wl_apsta). Restart.

And there you have it! No command line necessary. Wasn’t that easy?